Friday, February 19, 2016

Bench Project

Before
BEFORE
AFTER
AFTER

The Bench Before...


Originally, this "bench" was actually a low set of drawers. I can't even remember where I got it. We used it as a piano bench for a while. My practical and handy Mom added the padded seat cushion and a matching pillow case  (centre pillow) for me, according to our old decor colours at the time. You can probably tell it was sometime in the 90's. Well, we finally got a proper piano bench, and the drawers spent some time in the basement.

The Bench Revisited...   


When we moved to our current home, this bench ended up in the mudroom. Aren't mudrooms great? It is a perfect place to transition from out to in and vice versa! The bench with drawers is so practical to store tote bags, picnic blankets and such, and it is a fine place to stop and put your shoes on or take off those mucky boots. I felt it was time to revive the decor, however, and I needed a crochet project, so it was makeover time!


Scrappy Steps.... 

     I chose a neutral colour scheme to allow it to go from season to season easily. Three shades of brown in a worsted weight acrylic yarn. Very durable. I had such fun with the "Scrappy Steps" meothod that I used for my scarf in the Jelly Bean Jar Game... Sort of blog post, that I decided to revisit that. It works up beautifully into any rectangular or square shape.  I just measured the top surface of the cushion and followed the scrappy steps directions until it was the size I wanted. Original Scrappy Steps (afghan) instructions are here.


Crochet Seat cover.
Seat Cover
Seat cushion from below. Non-slip!

Cushion Method...  

The cushion is about an inch thick, and squared off at the edges, so I did the cover with a squared edge. And I didn't to the underside, because my brilliant Mom had added a non-slip grip to the bottom, and I didn't want to cover that up.

To get a tailored look on the sides, there is 1 round of single crochet (SC) all around the perimeter of the seat piece (3 SC in each corner), and then 2 rounds of double crochet (DC) working the first round into the back loops of the SC round. That gives it a crisper edge. To keep things neat and tidy, I finished the edge with a crab stitch (reverse single crochet) all the way around in the unworked front loops of the SC edge row. That mad the tidy "piping" around the edge of the seat.


Pillow Method....

Scrappy Steps Pillow
Pillow - FRONT
Pillow - BACK
For the pillow cover, I measured the pillow form and made another "scrappy steps" square to size. I was ready for a new stitch by then, and needed an entry and exit for the pillow for washing, so I did 2 rectangles, sized so that when the overlapped slightly, they were the same size as the pillow front. I added buttons and button hole closures to offer a central closure that also became a feature of the design. I did a SC join to attach the front and back panels, and then did a second round in Crab Stitch to give it a coordinating look with the bench seat cover.

Voila!


Bench - Seat Cover and Pillow

Friday, January 29, 2016

Freedom in Freeform

This purse is my first attempt at Freeform Crochet. And I am HOOKED!

My inspiration....

I first came across Freeform Crochet a number of years ago. I was intrigued and mesmerized by the beautiful pieces I saw on a shop called Irregular Expressions.  The pieces, including cuffs, necklaces and scarflettes, are beautiful and elegant - each unique and exquisitely crafted! I was also very impressed that the artist had sold so many of them and fetches a decent (gulp!) price for each unique wearable piece of art.

My Project...
The main purse is one I've had for years. In fact, it was made for me when I was about 9 or 10 years old. The front was emblazoned with my (former) initials EAW in red embroidery. While I appreciated the gift, I did not actually use it much when it was first given to me, but kept it for sentimental reasons. When I came across it recently, I had just taken an online class in freeform crochet and I thought.... here is my chance to really USE this purse - and I went for my hooks! Following the simple instructions from the class, and with some experimentation, this is what I came up with. I covered the front flap (and the giant initials) with freeform "scrumbles" and found a fun button to use as a closure. Ta-da! This was my purse of choice all through the summer and early fall, and I know I'll go back to it again and again.

My Resources...
Here are a few more links to some freeform inspirations and resources:
10 Freeform Crochet Tips -Tips and information on Freeform
Freeform by Prudence - Etsy store with tutorials and books for sale
Craftsy - freeform Crochet class


Cheers,
BusyLizzy


Friday, January 15, 2016

Socks on TV - oh, and me too!

Toe Up Socks, under construction
in my living room.

I have been most fortunate to be, on occasion, classified as a 'working actor' on a couple of TV shows. On set, I often keep busy during the waiting time by working on my latest knit or crochet projects. In July 2014, I was working on a pair of "toe up socks" - like the ones pictured here, and that was what I brought to pass the time while I waited to be called to set.

Coincidentally, the director had asked the props department to supply knitting needles and yarn as a possible prop to use during a scene in which my character was supposed to be waiting for her daughter. When they saw that I had my own knitting project in progress, my socks made it into the show! I'm not sure which was more fun: being on camera, or knowing that my handiwork was there with me!

Finished "star socks."
Here are the completed socks. And here is a link to watch Motives & Murders: Cracking the Case, Season 4, Episode 10 entitled "A Chance Encounter" in which my socks were featured - and me, as Marjorie Stark ! (The socks are seen for precisely 1 second, at 36:59 into the show, but I know they were there, and that is what counts!)

Cheers,
BusyLizzy

Friday, October 3, 2014

Craft Happy in Orangeville

BusyLizzy Boutique (Elizabeth Glenday) is teaching beginner classes in knit and crochet at Craft Happy.
Craft Happy, a new store in Orangeville that will be addictive to crafters of all kinds!
I'm delighted to be sharing the love of crochet and knitting in Orangeville this November! Craft Happy is hosting these two beginner classes early in the month. Even for new yarn crafters this should leave lots of time to come up with some great gifts for friends and family in time for the holidays. I don't recommend that you make each family member an afghan, or even a scarf, but you could easily whip off some cell phone cases, dishcloths or other small projects! Here are some examples of beginner patterns from the Red Heart website:

I look forward to teaching the very basics of knitting and crocheting and being there to answer questions and troubleshoot those first struggles along the way to becoming a Happy Crafter!

Cheers! 
BusyLizzy


Monday, June 16, 2014

Celebrating Worldwide Knit in Public Day - Tuesday June 17th

Worldwide Knit in Public day coming to Orangeville!

Tracy and Sarah share a laugh, some coffee and some crochet at Mochaberry Coffee shop!
Wish I could remember what they were laughing about!
There is never a shortage of laughs!
Tuesday June 17, 2014 is Worldwide Knit in Public day, and I couldn't be more excited that there is an event being held in Orangeville! I'm looking forward to getting together with some of my own public yarn addicts to enjoy the festivities outside the Orangeville Public Library.

Here is the story of my own little group, PUBlic Crochet Orangeville

Knitting (okay, crocheting) in public is something that has become near and dear to my heart.While displaying and selling my BusyLizzy Boutique crochet items at local venues, I often heard people comment that they wish they had learned to crochet, or that they tried it once but just couldn't get the hang of it. I wanted to bring crocheting out of the livingrooms and firesides of our town, and into public places were it can be noticed and enjoyed again! I started an afternoon group each month called Hooking up To Crochet at a local coffee shop. That was back in 2011! Then a few yarn addicts who worked during the day or had small children in the afternoons asked for an evening group. Thus, PUBlic Crochet Orangeville was born! We meet monthly in a local pub and crochet for a few hours while solving the problems of the world over a libation and a few snacks! Here are some random snaps of our group meetings over the years. Come join our PUBlic Crochet Orangeville group on Facebook to follow the dates and progress of the group!
Hooking up to Crochet group member, Shiela, holding up her finished afghan project.
Shiela's finished Afghan - Great masculine colour choices!

Eva looks at her pattern while beginning her crochet project during our afternoon Hooking up to Crochet group.
Eva is concentrating on her pattern, but once she gets going, look out!
 We currently meet for our afternoon group on the 2nd Monday of each month at 11:00 am at Mochaberry coffee shop in Orangeville.
Virginia joins the PUBlic Crochet group when her gang is all tucked in bed. We enjoy having a knitter among us too!
Knitters are allowed at the PUBlic Crochet meetings too! No discrimination when it comes to the yarn arts!

Paula showed us that beginners can get a lot accomplished in a sitting!


Petra and Eva are both reading patterns in their native languages, but they can share them with us via universal crochet symbols!
Petra works with crochet symbols when she follows patterns. That way she can follow patterns in many languages!

Janice is getting the hang of a simple chain stitch and a few single crochets. At The Winchester Arms in Orangeville.
First few stitches EVER! Way to go, Janice!
 The evening PUBlic crochet has been taking place at the Mad Hatter/Ruby Pier lately, and we meet on the 4th Tuesday of the Month (new in June 2014) at 8pm. We have also enjoyed meetings at The Winchester Arms and Mill Creek Pub!
Kat has a wicked smile and her tongue sticking out in a fun expression. Crochet brings out the fun in people! Even at the local Winchester Arms pub!
Having fun at the Winchester Arms with a crochet hook!

Our group donated about 100 squares to the Seniors for Santa drive! Volunteers then stitched them into lap afghans for the elderly in our community.
These squares, donated by our members, were made into Lap Afghans for the Seniors for Santa program in Orangeville.

A gathering at Mochaberry coffee shop.
Great times at Mochaberry!

Monday, May 19, 2014

Stashing the Bits and Pieces II (The Sequel)

I showed my solution for storing small balls of yarn bits in a previous blog post. But what about the really tiny bits?You know... the tails and ends a meter or so long? Or even shorter? Don't tell me you throw them away! I won't hear of it!  There are tons of projects you can do with bits and scraps, and it might also save you when an older project needs a quick repair and you have actually kept a few tails of the yarn.

Projects/uses for little tails:
1) use yarn to attach tags to your work if you sell it
2) make a scrappy steps project
3) make something small (headband, bowtie, face scrubbie) - links to some patterns for the "small stuff"
4) if you still don't have enough of one colour make something with lots of stripes or patches
5) tie ends together and make a "Scrapghan" or other simple project!

There are LOTS of ways to use those little bits... and here is a great way to store them, without getting tangled, until you need them:
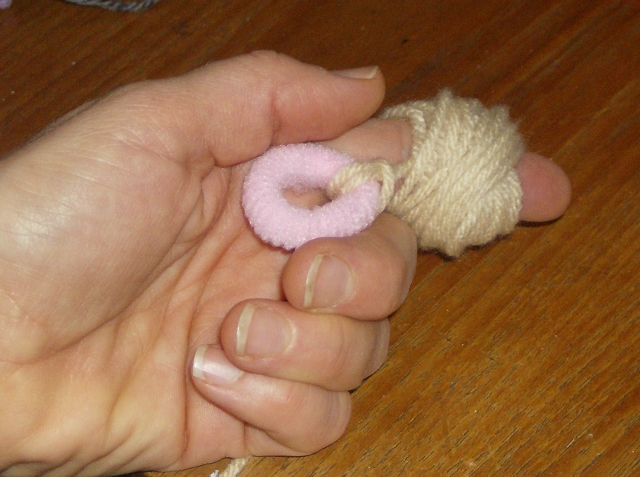
1. Save some plastic pull tabs from cartons of milk or juice.
2. Loosely loop a scrap of yarn by folding it several times. In half, half again, etc. until it is about 6" long.
3. Slide the looped yarn through the loop of the tab.
4. Tie the yarn on itself in a loose knot around the tap loop.
5. You can write on the tab with a permanent marker if you wish. I sometimes add a number for the weight of the yarn, i.e. 2 for fine, 3 for light worsted, 4 for worsted, 5 for bulky.
6. Toss in a bag or basket in your yarn stash for later use.
Happy Stashing and Scrapping!

Cheers,
BusyLizzy

Friday, May 9, 2014

Stashing the Bits and Pieces

How do you deal with those little bits of yarn that you just can't bear to toss? Yarn bobbins (pictured above) are one option. I find they leave a straggly end that can tangle while stored. They are also a bit fussy to wind, and even fussier to unwind when they are used in a project. Time for a new solution!
Look how neat these little bundles are, and no stragglers! All you need is some soft hair elastics. These are about an inch in diameter but will stretch quite a lot, and won't tangle or fray the yarn, because they are made of a stretchy terry-cloth like material. You can find them by the dozens at discount stores. 
Here is how I did it!  
`1. Tie one end of your yarn to the elastic. Keep it fairly loose.
2. Wind the yarn around your finger (not too tight) creating a centre-pull ball.
3. Remove the ball from your finger carefully.

4. Loop the elastic over the ball, securing the loose end and keeping the centre-pull end ready to use! 

Ta-da! Happy stashing...