Showing posts with label How-to. Show all posts

Friday, February 19, 2016

Bench Project

Before
BEFORE
AFTER
AFTER

The Bench Before...


Originally, this "bench" was actually a low set of drawers. I can't even remember where I got it. We used it as a piano bench for a while. My practical and handy Mom added the padded seat cushion and a matching pillow case  (centre pillow) for me, according to our old decor colours at the time. You can probably tell it was sometime in the 90's. Well, we finally got a proper piano bench, and the drawers spent some time in the basement.

The Bench Revisited...   


When we moved to our current home, this bench ended up in the mudroom. Aren't mudrooms great? It is a perfect place to transition from out to in and vice versa! The bench with drawers is so practical to store tote bags, picnic blankets and such, and it is a fine place to stop and put your shoes on or take off those mucky boots. I felt it was time to revive the decor, however, and I needed a crochet project, so it was makeover time!


Scrappy Steps.... 

     I chose a neutral colour scheme to allow it to go from season to season easily. Three shades of brown in a worsted weight acrylic yarn. Very durable. I had such fun with the "Scrappy Steps" meothod that I used for my scarf in the Jelly Bean Jar Game... Sort of blog post, that I decided to revisit that. It works up beautifully into any rectangular or square shape.  I just measured the top surface of the cushion and followed the scrappy steps directions until it was the size I wanted. Original Scrappy Steps (afghan) instructions are here.


Crochet Seat cover.
Seat Cover
Seat cushion from below. Non-slip!

Cushion Method...  

The cushion is about an inch thick, and squared off at the edges, so I did the cover with a squared edge. And I didn't to the underside, because my brilliant Mom had added a non-slip grip to the bottom, and I didn't want to cover that up.

To get a tailored look on the sides, there is 1 round of single crochet (SC) all around the perimeter of the seat piece (3 SC in each corner), and then 2 rounds of double crochet (DC) working the first round into the back loops of the SC round. That gives it a crisper edge. To keep things neat and tidy, I finished the edge with a crab stitch (reverse single crochet) all the way around in the unworked front loops of the SC edge row. That mad the tidy "piping" around the edge of the seat.


Pillow Method....

Scrappy Steps Pillow
Pillow - FRONT
Pillow - BACK
For the pillow cover, I measured the pillow form and made another "scrappy steps" square to size. I was ready for a new stitch by then, and needed an entry and exit for the pillow for washing, so I did 2 rectangles, sized so that when the overlapped slightly, they were the same size as the pillow front. I added buttons and button hole closures to offer a central closure that also became a feature of the design. I did a SC join to attach the front and back panels, and then did a second round in Crab Stitch to give it a coordinating look with the bench seat cover.

Voila!


Bench - Seat Cover and Pillow

Monday, May 19, 2014

Stashing the Bits and Pieces II (The Sequel)

I showed my solution for storing small balls of yarn bits in a previous blog post. But what about the really tiny bits?You know... the tails and ends a meter or so long? Or even shorter? Don't tell me you throw them away! I won't hear of it!  There are tons of projects you can do with bits and scraps, and it might also save you when an older project needs a quick repair and you have actually kept a few tails of the yarn.

Projects/uses for little tails:
1) use yarn to attach tags to your work if you sell it
2) make a scrappy steps project
3) make something small (headband, bowtie, face scrubbie) - links to some patterns for the "small stuff"
4) if you still don't have enough of one colour make something with lots of stripes or patches
5) tie ends together and make a "Scrapghan" or other simple project!

There are LOTS of ways to use those little bits... and here is a great way to store them, without getting tangled, until you need them:
1. Save some plastic pull tabs from cartons of milk or juice.
2. Loosely loop a scrap of yarn by folding it several times. In half, half again, etc. until it is about 6" long.
3. Slide the looped yarn through the loop of the tab.
4. Tie the yarn on itself in a loose knot around the tap loop.
5. You can write on the tab with a permanent marker if you wish. I sometimes add a number for the weight of the yarn, i.e. 2 for fine, 3 for light worsted, 4 for worsted, 5 for bulky.
6. Toss in a bag or basket in your yarn stash for later use.
Happy Stashing and Scrapping!

Cheers,
BusyLizzy

Friday, May 9, 2014

Stashing the Bits and Pieces

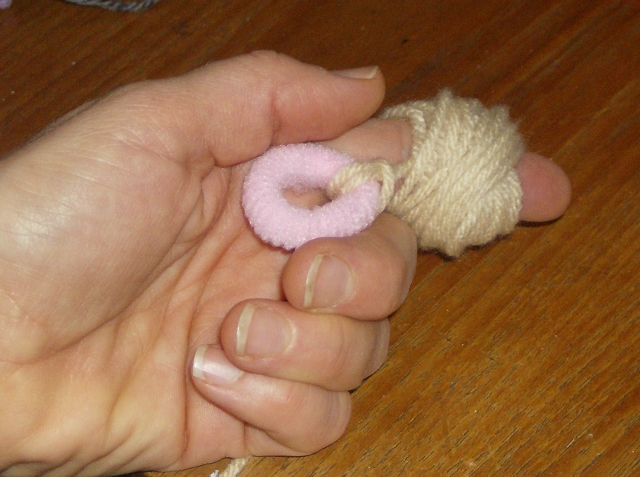
How do you deal with those little bits of yarn that you just can't bear to toss? Yarn bobbins (pictured above) are one option. I find they leave a straggly end that can tangle while stored. They are also a bit fussy to wind, and even fussier to unwind when they are used in a project. Time for a new solution!
Look how neat these little bundles are, and no stragglers! All you need is some soft hair elastics. These are about an inch in diameter but will stretch quite a lot, and won't tangle or fray the yarn, because they are made of a stretchy terry-cloth like material. You can find them by the dozens at discount stores. 
Here is how I did it!  
`1. Tie one end of your yarn to the elastic. Keep it fairly loose.
2. Wind the yarn around your finger (not too tight) creating a centre-pull ball.
3. Remove the ball from your finger carefully.

4. Loop the elastic over the ball, securing the loose end and keeping the centre-pull end ready to use! 

Ta-da! Happy stashing...

Sunday, March 11, 2012

Tucking in your Tails

Our Hooking up to Crochet group is working on some squares to donate to a local Senior's Santa Hamper project. Volunteers will assemble the squares into lap afghans, and these, along with other necessities and goodies will be delivered to seniors in local retirement and nursing homes at Christmas!

The conversation over coffee at this month's Hooking up to Crochet meeting was all about tails! There were some seasoned 'hookers' around the table too, so it was great to hear the methods and reasons behind them:

Dale M shared a story from an experience with a similar "squares" charity project. After many hours of volunteers stitching the donated squares together, the final products were washed before being sent out to the needy recipients. To the horror of the volunteers, some of the squares came UNRAVELED in the wash! Some of the creators had left only an inch or less when switching colours or tucking in the ends. This caused them to come apart on the first washing! Dale's advice: Always leave at least 4-6" tail when switching a colour or ending off. When weaving in the tail, use a darning needle and travel along the base of a row of stitches to hide it well and then make a sharp turn (90 degrees or more) somewhere along the length of the tail. That way it can be tugged and stretched in different directions with less chance of unraveling.
After their experience, Dale's group actually requested that tails be "left dangling" on all donated squares. Volunteers felt it was preferable to tuck those pesky tails in securely themselves, rather than do all that assembly only to have a stray square or two unravel in the wash!

Sarah W-L ties a small knot when finishing a colour or ending a project. Many of her items are wearables for babies and children, and therefore subject to many washings! The knot means extra security and durablity. A shorter end is then sewn back through a few stitches to hide it inside the work. She is not too worried about the length of the tail, as it is not going to unravel with the handy little knot in place!

Liz (me) was experimenting with a couple of techniques recently learned online:
First I tried the Russian join. Thread the new yarn onto a darning needle and thread it through your last loop. Then splitting the yarn as you go, splice back through the length of your new yarn a few inches. Remove the needle, give the yarn a tug, then just cut off the small remaining end very close. Advantages: it is neat and quite invisible and conserves yarn. Disadvantages: it's a bit time consuming and fiddly for those who avoid the use of a darning needle, and can add a bit of bulk to the few stitches where the yarn is double thick from the join. (This is not very noticeable on most projects, though). I like this method, and will definitely use it when joining same colour yarns, as well as when I'm looking for that "extra neat" finish.
I also experimented with a simple 'invisible join' I found and re-pinned on my "Crochet Love" board on Pintrest. This one is a single knot, slipped down to the right of the last loop of the old yarn. You just continue crocheting with the new one and the knot slips neatly inside. This method doesn't address the 2 tails that are left hanging, but one assumes you could still "work over" them or weave them in later with a darning needle with whatever method you favour.
My favourite tail tucking method with finer yarns, is simply to crochet the next few stitches while tucking the new tail this way and that through the work (basically tangling it up neatly inside the next 5-10 stitches in the row - following whatever pattern I'm working on).

Care to join us for a Hooking up to Crochet (daytime) meeting? Or our sister (evening) group PUBlic Crochet? Here are some links to upcoming events!
Wednesday April 11th, 11 am, Mochaberry, 177B Broadway, Orangeville, RSVP on Facebook
Monday April 16th, 8 pm, Winchester Arms Pub, 171 Broadway, Orangeville. RSVP on Facebook


Wednesday, August 31, 2011

Shirt-in-Progress

A used T-shirt ready to be cut into something new.
Wash and dry the T-shirt. Lay it flat.

Here is a peek into the process for a T-shirt transformation.


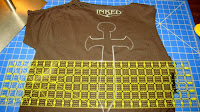
I picked up this T-shirt at a local thrift store and washed and dried it so it was ready to rip up! Here is a view from the back on my cutting board awaiting its transformation.

But let's rewind for a second. The first thing that attracted me to
BusyLizzy cuts the collar from a T-shirt to make it more feminine.
Removing the collar makes a
T-shirt more feminine.
the shirt was the asymmetrical design, and the tattoo theme. I recently got "inked" so I'm open to exploring the culture and expression of this edgy style!

Back to the cutting board... Here it is minus the collar (usually the first thing to go, when making a shirt more feminine). Now you can see the asymmetrical design on the front. This was defin

itely going to be a theme for me in designing this T-shirt.

Asymmetrical design details on a t-shirt transformation.Next steps:
  • Cut off Right sleeve
  • Slits and braiding technique for 'shirred' effect up the Right side
  • Try it on the mannequin to see how it drapes... so far so good!
  • Slits and a braiding technique used to create a capped sleeve on the Left
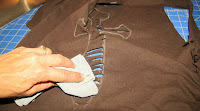
Now for the back: Using the dagger idea from the front, I decided on a simplified motif for the back, to be carved in 1" strips. The chalk marks will come off with a damp cloth or next time it is washed. You can also see the detail on the Left shoulder here.

Cut a design on a t-shirt using a chalk outline as a guide.
Draw your design with chalk.
Cross design cut into a t-shirt.
The chalk wipes off with a damp cloth.

When viewing it on the mannequin again, I made a few more adjustments
  • Made the armhole a bit smaller with a few tiny ties
  • Added an off centre plunge to the neckline for more asymmetry
And here it is from Right, Back, Left and Front.... "Inked"

You can purchase this in my ETSY shop!

Thanks for listening,

BusyLizzy