 |
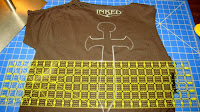
| Wash and dry the T-shirt. Lay it flat. |
Here is a peek into the process for a T-shirt transformation.
I picked up this T-shirt at a local thrift store and washed and dried it so it was ready to rip up! Here is a view from the back on my cutting board awaiting its transformation.
But let's rewind for a second. The first thing that attracted me to
 |
| Removing the collar makes a T-shirt more feminine. |
the shirt was the asymmetrical design, and the tattoo theme. I recently got "inked" so I'm open to exploring the culture and expression of this edgy style!
Back to the cutting board... Here it is minus the collar (usually the first thing to go, when making a shirt more feminine). Now you can see the asymmetrical design on the front. This was defin
itely going to be a theme for me in designing this T-shirt.
- Cut off Right sleeve
- Slits and braiding technique for 'shirred' effect up the Right side
- Try it on the mannequin to see how it drapes... so far so good!
- Slits and a braiding technique used to create a capped sleeve on the Left
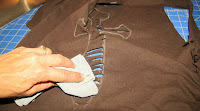
Now for the back: Using the dagger idea from the front, I decided on a simplified motif for the back, to be carved in 1" strips. The chalk marks will come off with a damp cloth or next time it is washed. You can also see the detail on the Left shoulder here.
 |
| Draw your design with chalk. |
 |
| The chalk wipes off with a damp cloth. |
When viewing it on the mannequin again, I made a few more adjustments
- Made the armhole a bit smaller with a few tiny ties
- Added an off centre plunge to the neckline for more asymmetry
And here it is from Right, Back, Left and Front.... "Inked"
Thanks for listening,
BusyLizzy


 You can purchase this in my